Boy have I been busy, I am between trips to CO right now and it feels like I am playing catch up, with crafts and family. Meaning finishing gifts and not getting pictures taken! But what do you do?
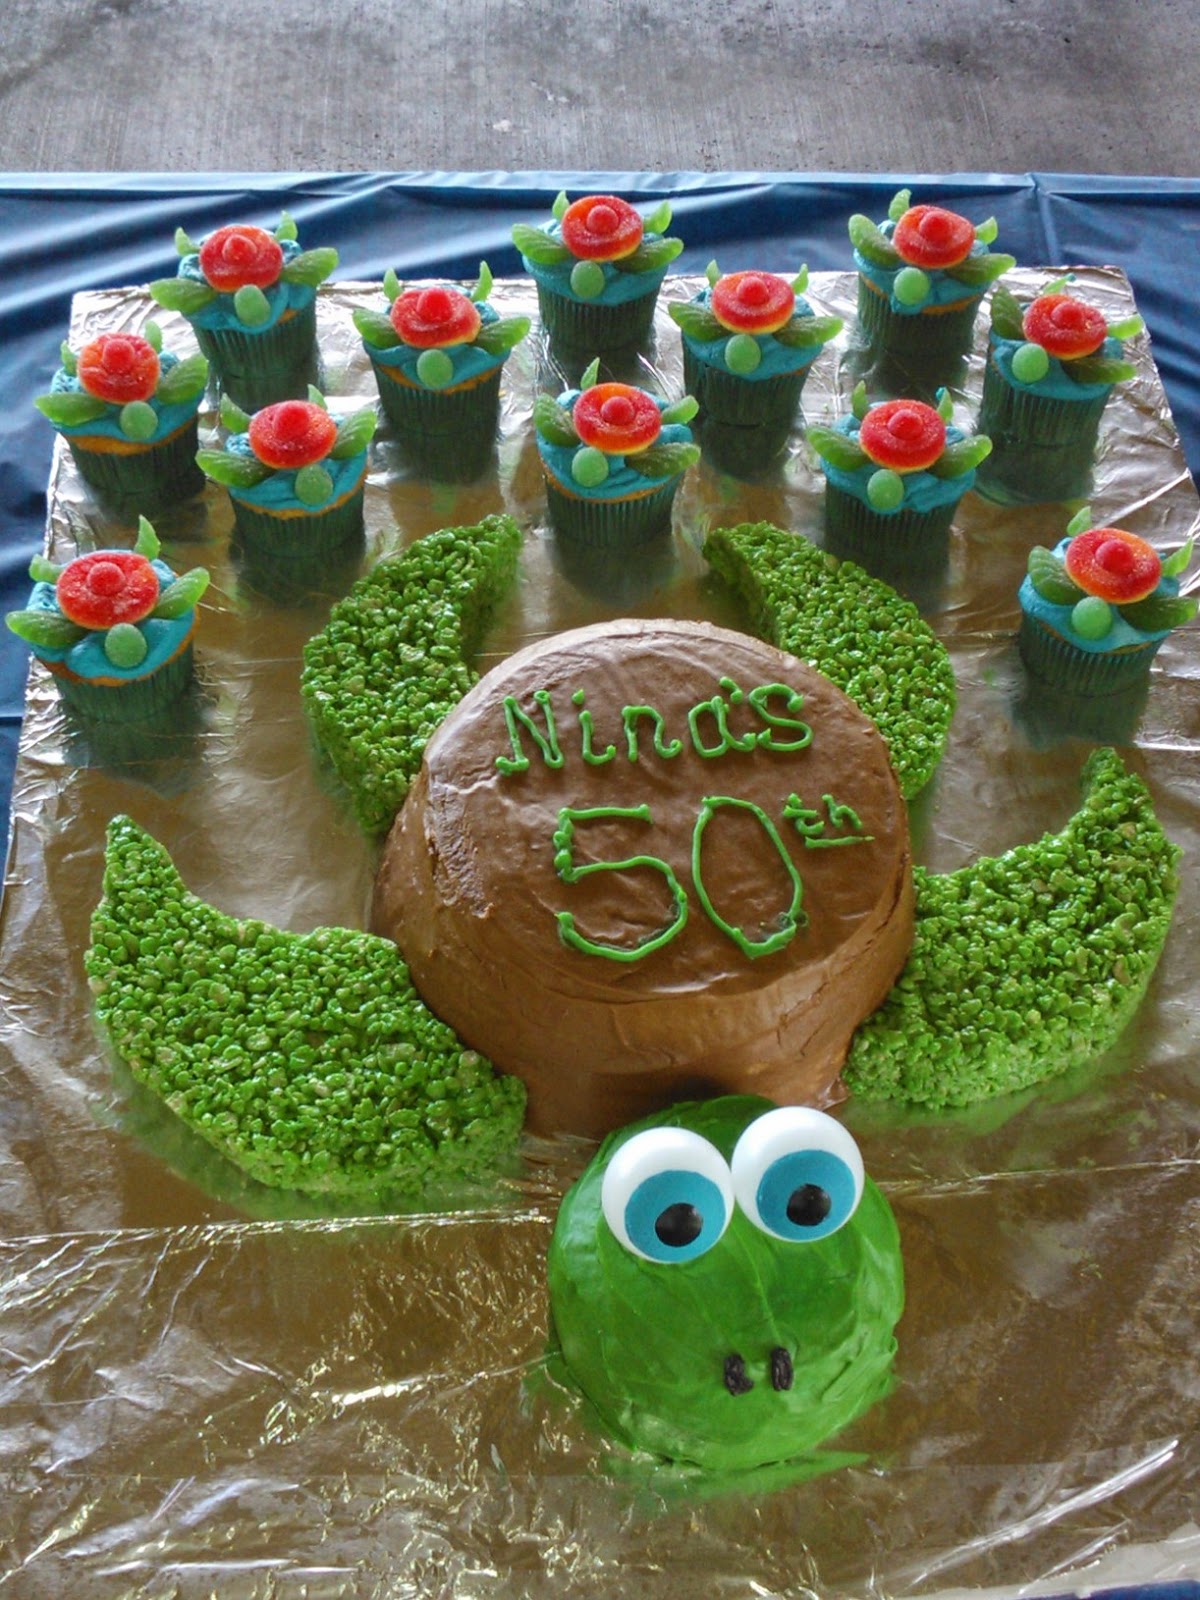
Let's see which new craft do I want to post today.....hmmm I guess we'll do Riley's birthday cake since that one was done way back in March.
For Riley's first birthday, Kyle and I wanted to do something special for him since he'll get toys and books from everyone else in our giant family so we decided we would make him a cake that he and everyone else could enjoy, plus it makes it one less thing that his grandma had to pay for and not worry about.
His theme was western so I went all out and wanted to make it like a cowboy/Woody from
Toy Story. With the yellow/red plaid shirt and a bandana. I asked if they had a preference on flavor and they said fruity so I looked up a recipe for Orange dreamsicle cake/frosting as well as a raspberry cake.
The recipes are as follows:
Raspberry cake-
- 1 white cake mixed following box
- 1pkg of raspberry jello(4oz)
- 1 cup boiling water
- 1/2 cup cold water
Make the cake following the directions on the box and bake.. Let it cool. I waited to pout the jello on top until I had stacked it into place.Poke holes all over. Mix the jello with the BOILING water and stir until dissolved. Add cold water then pour all over the cake and refrigerate for 2 hours. made 1 13x9 cake
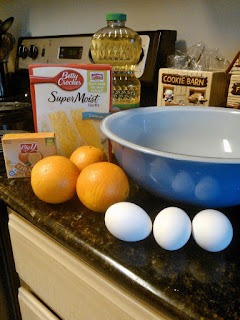
Orange Dreamsicle Cake with glaze-
- 1 box lemon cake mix
- 1 box orange jello- 4oz
- 1/3 cup oil
- 3 eggs
- 1/2 cup OJ ( i used fresh)
- 3/4 cup water
- 1 orange zest
glaze-
- 3 tablespoons powdered sugar
- 1/2 cup OJ (fresh)
heat oven to 350 degrees. I grease my pans then lay was paper on the bottom and then spray with more grease to help my cakes come out SUPER easy and it helps them cook flat!
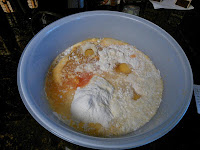
In a large add dry cake mix, jello powder, oil eggs, OJ, water, and zest until smooth.
Pour in pan and bake for 25 mins cool completely and take out of pan.
Poke holes all over and pour the glaze over. Refrigerate a few hours. I made 2 batches of this to do 1- 13x9 and 2- 7"square.
In between both tiers I used a creamsicle frosting which oh my god it tasted just like a creamsicle! I wanted to just eat the frosting by the spoonfuls!
Creamsicle Frosting Recipe:
- 8 oz sour cream
- 8 oz cool whip
- 1/2 cup OJ (i used fresh)
- 1 1/2 cup sugar
- 1 teaspoon orange extract
mix OJ and sugar until completely dissolved
add extract
mix in sour cream until well blended
then fold in cool whip and layer between the cakes.
After I stack the cakes I cover them and let them sit in the fridge for a few hours to really set and then I can wipe off any filling that has spooged out....yes i said spooged lol I am not even sure how to spell it but i love using the word!
I used a cream cheese frosting to frost the outside cakes, I made two batches one dyed yellow and one dyed bright red!
Cream cheese frosting Recipe:
- 8 oz cream cheese room temp
- 1 stick unsalt butter softened
- 1 lb powdered sugar
- 1 teaspoon vanilla
- 1/4 teaspoon salt
bet cream cheese and butter until smooth
add powdered sugar bit by bit until smooth
(before I add the coloring I take my cakes out of the fridge and do a crumb coat and then out em back in the fridge while I do the other one so it can set and get hard/crusty!)
Mix in food gel colors and frost away.
I didn't keep track of how much coloring I used I just went until I liked the color.

To get the true red color that I wanted I had to mix RED and CHRISTMAS RED(not pictured!) and I just used bright yellow. I frosted the 13x9 yellow and the 7x7 red
Now put back in the fridge let em set and harden up and set and then take em out to decorate.
I used black, white, and red Wilton icing with a #3 tip I believe and did my lines. the yellow layer got red lines to look like a plaid shirt and the red layer got white and black to look like a bandana, then I stacked the tiers.
 |
| use a tooth to make a channel for you frosting. it helped me keep straight. |
 |
| my sketch of how I wanted it to look |
I wanted to hide the tier so I went to my trusty Winco and found some marshmallow ropes and used some brown food color stuff and painted it on to make it look like a real rope.I knew no one would eat them so I hot glued it to the plastic tier. I also got some sheriff stars from the dollar store and put those around the corners and I was done.
 |
| this as a test one the real ones I used were 36" so it was one wrapped all the way around. |
It was a hit and everyone loved it, it was soooo super moist and it tasted like my childhood eating dreamsicles while laying out on the hot driveways in the Colorado sun after playing in the sprinkler. I was in heaven!


